> ## Documentation Index
> Fetch the complete documentation index at: https://docs.wolfia.com/llms.txt
> Use this file to discover all available pages before exploring further.
# Chrome Extension Quickstart: Your First Autofill
> Walk through your first vendor-portal questionnaire with the Wolfia Chrome extension: scan, review the drafted answers, and write them back to the portal.
By the time you finish, the questions in the vendor portal will have answers filled in, ready for you to submit.
Please make sure the extension is installed and you're logged in before you start. If not, follow the [installation guide](/how-to/chrome-extension/installation) first, then come back.
## Scanning questions
Go to the vendor portal and open the questionnaire. Scroll until you can see real questions on the screen, not a welcome page or a list of sections. This is the page Wolfia will read.
Click the **Wolfia** icon in your browser's toolbar (top-right). A side panel slides in from the right. Keep the questionnaire visible behind it.
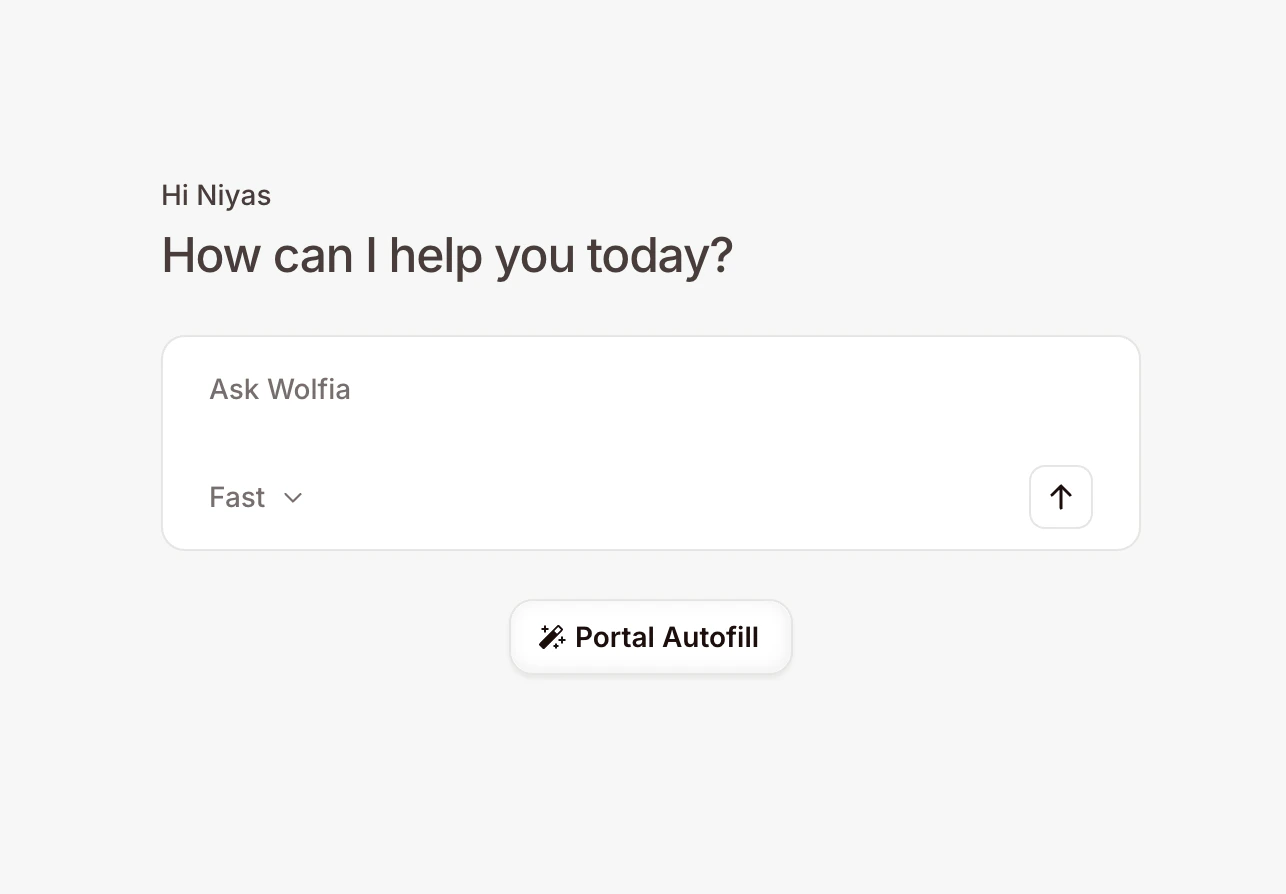
On the home screen of the side panel ("How can I help you today?"), click the **Portal Autofill** button below the chat box.
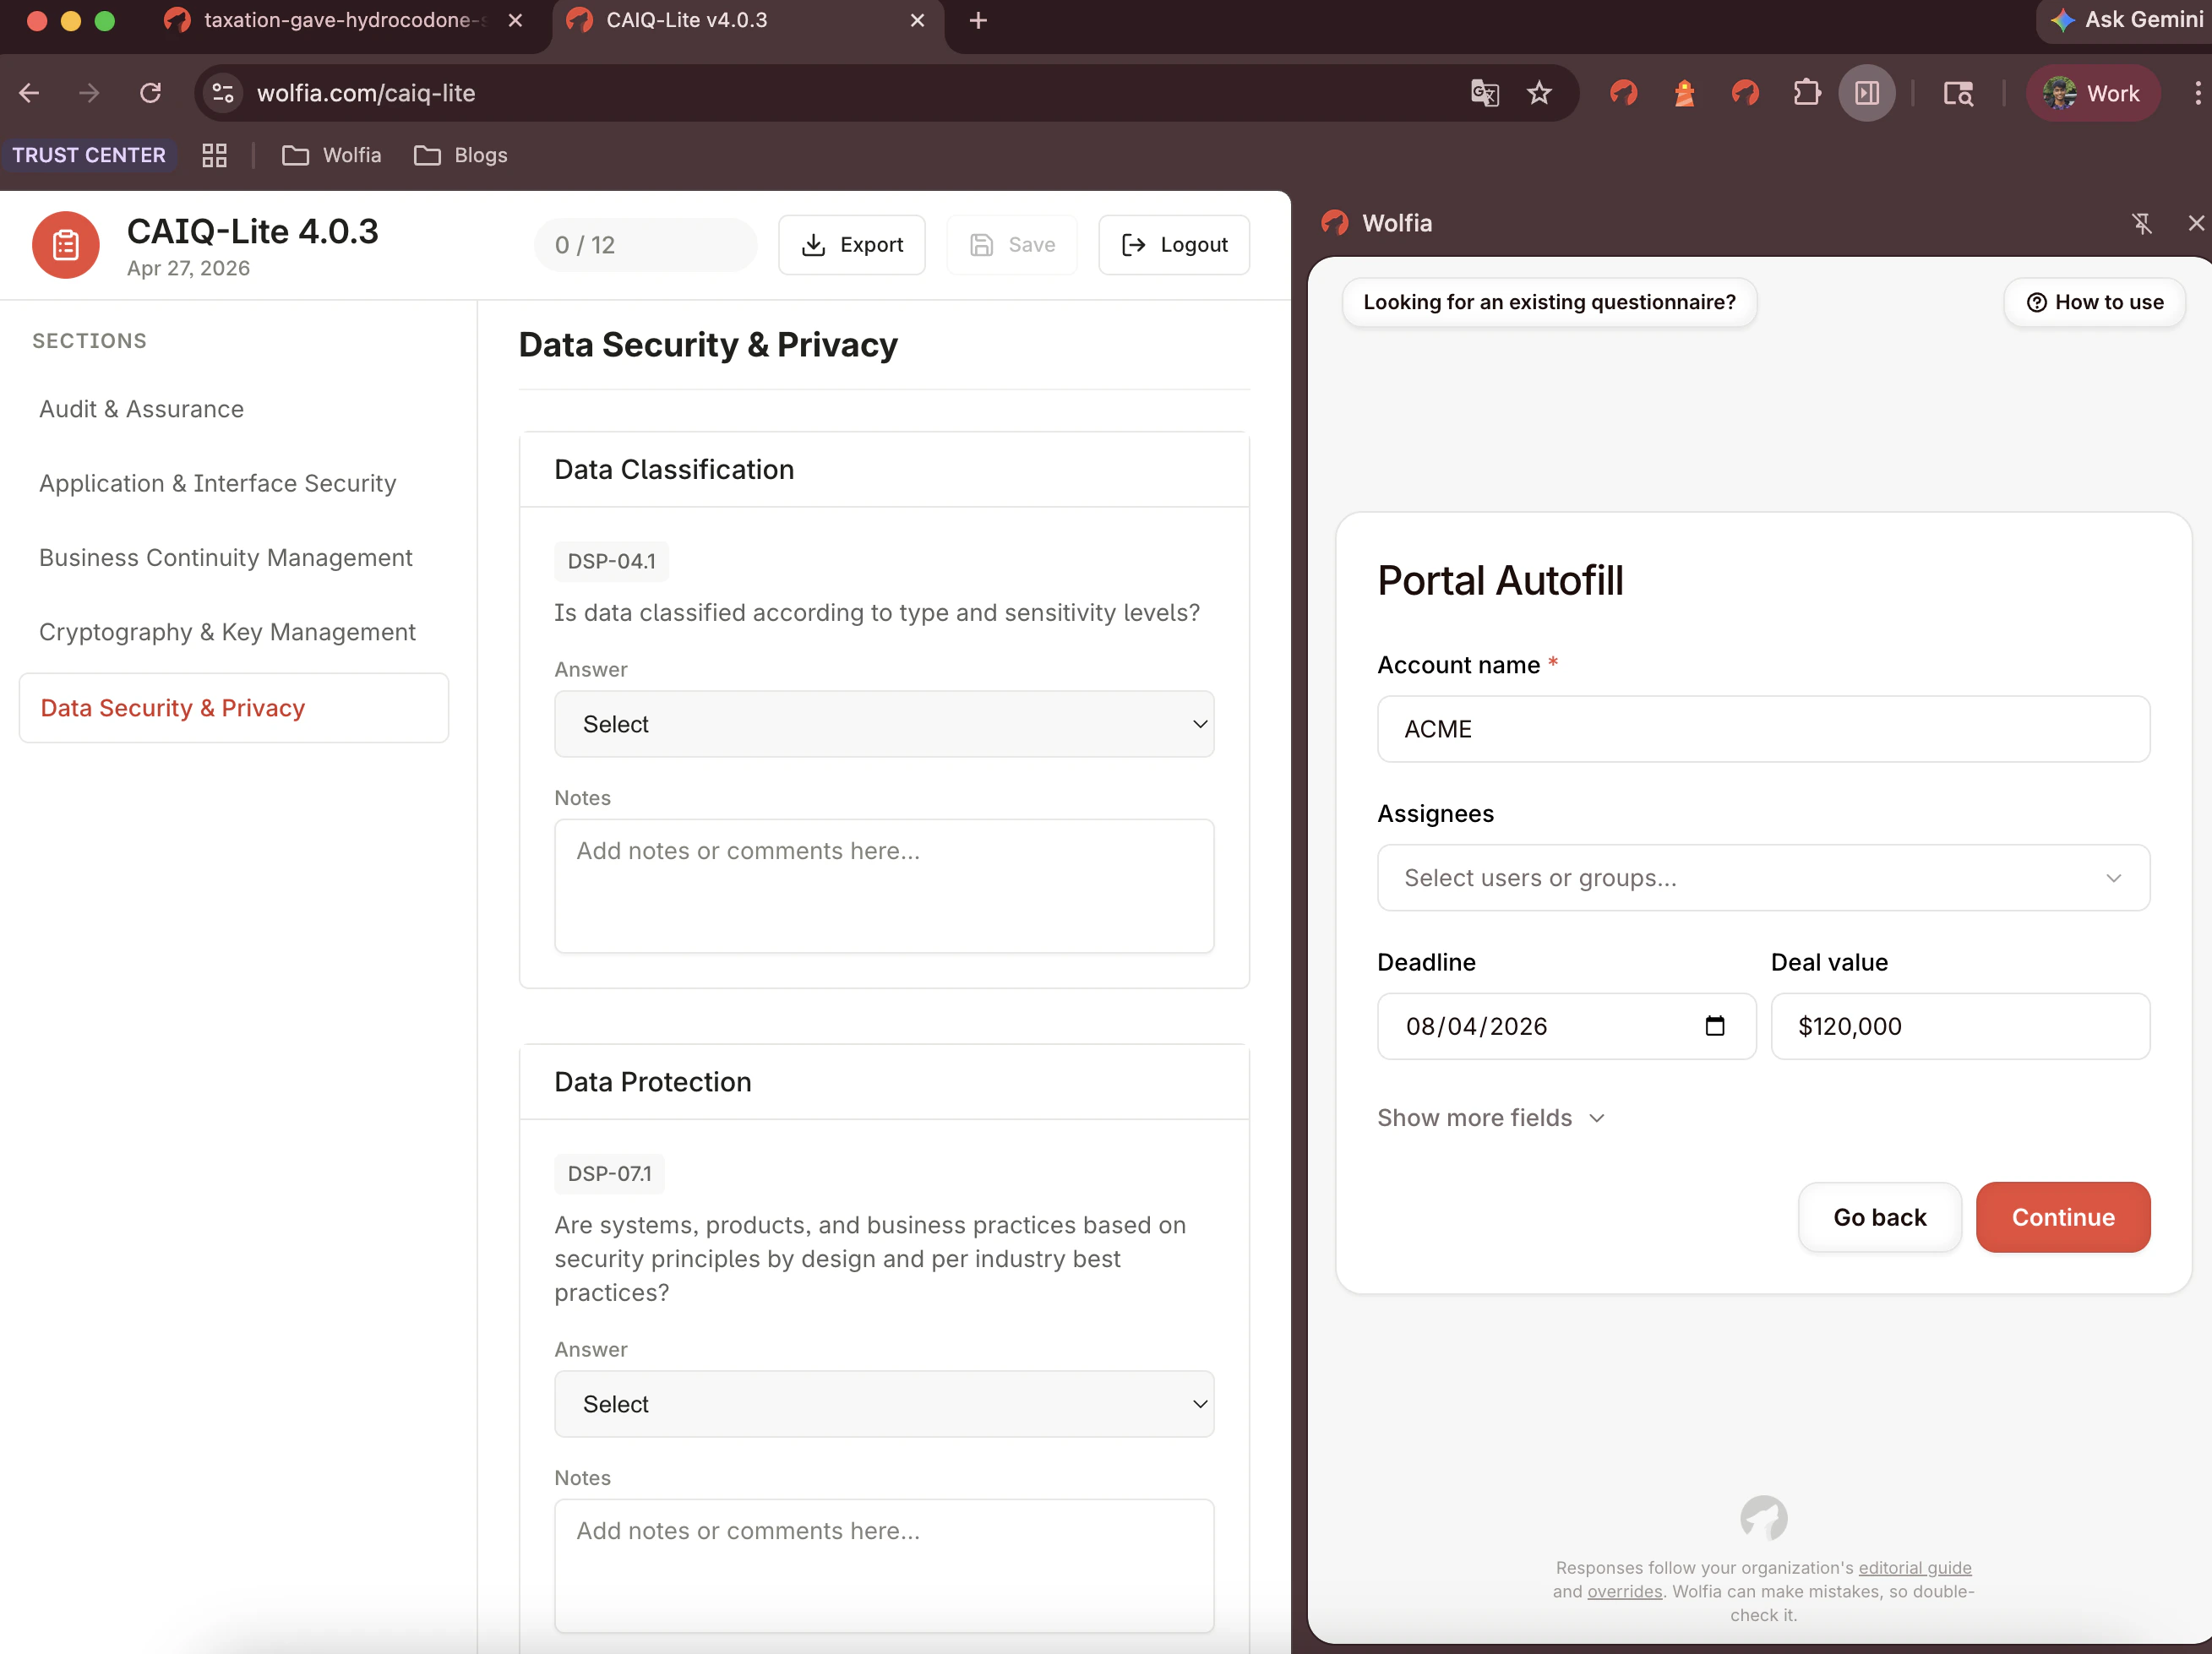
 A short form opens. Fill in what you know:
* **Account name**: the customer or vendor this questionnaire is for (e.g. *Acme Inc.*)
* **Business segments**: the segments that apply, so Wolfia uses the right knowledge
* **Assignees**: the people or groups responsible for the response
* **Deadline**: when the questionnaire is due
* **Deal value**: estimated deal size in USD
Some fields may be marked required by your team. Click **Show more fields** if your organization has added extra fields.
A short form opens. Fill in what you know:
* **Account name**: the customer or vendor this questionnaire is for (e.g. *Acme Inc.*)
* **Business segments**: the segments that apply, so Wolfia uses the right knowledge
* **Assignees**: the people or groups responsible for the response
* **Deadline**: when the questionnaire is due
* **Deal value**: estimated deal size in USD
Some fields may be marked required by your team. Click **Show more fields** if your organization has added extra fields.
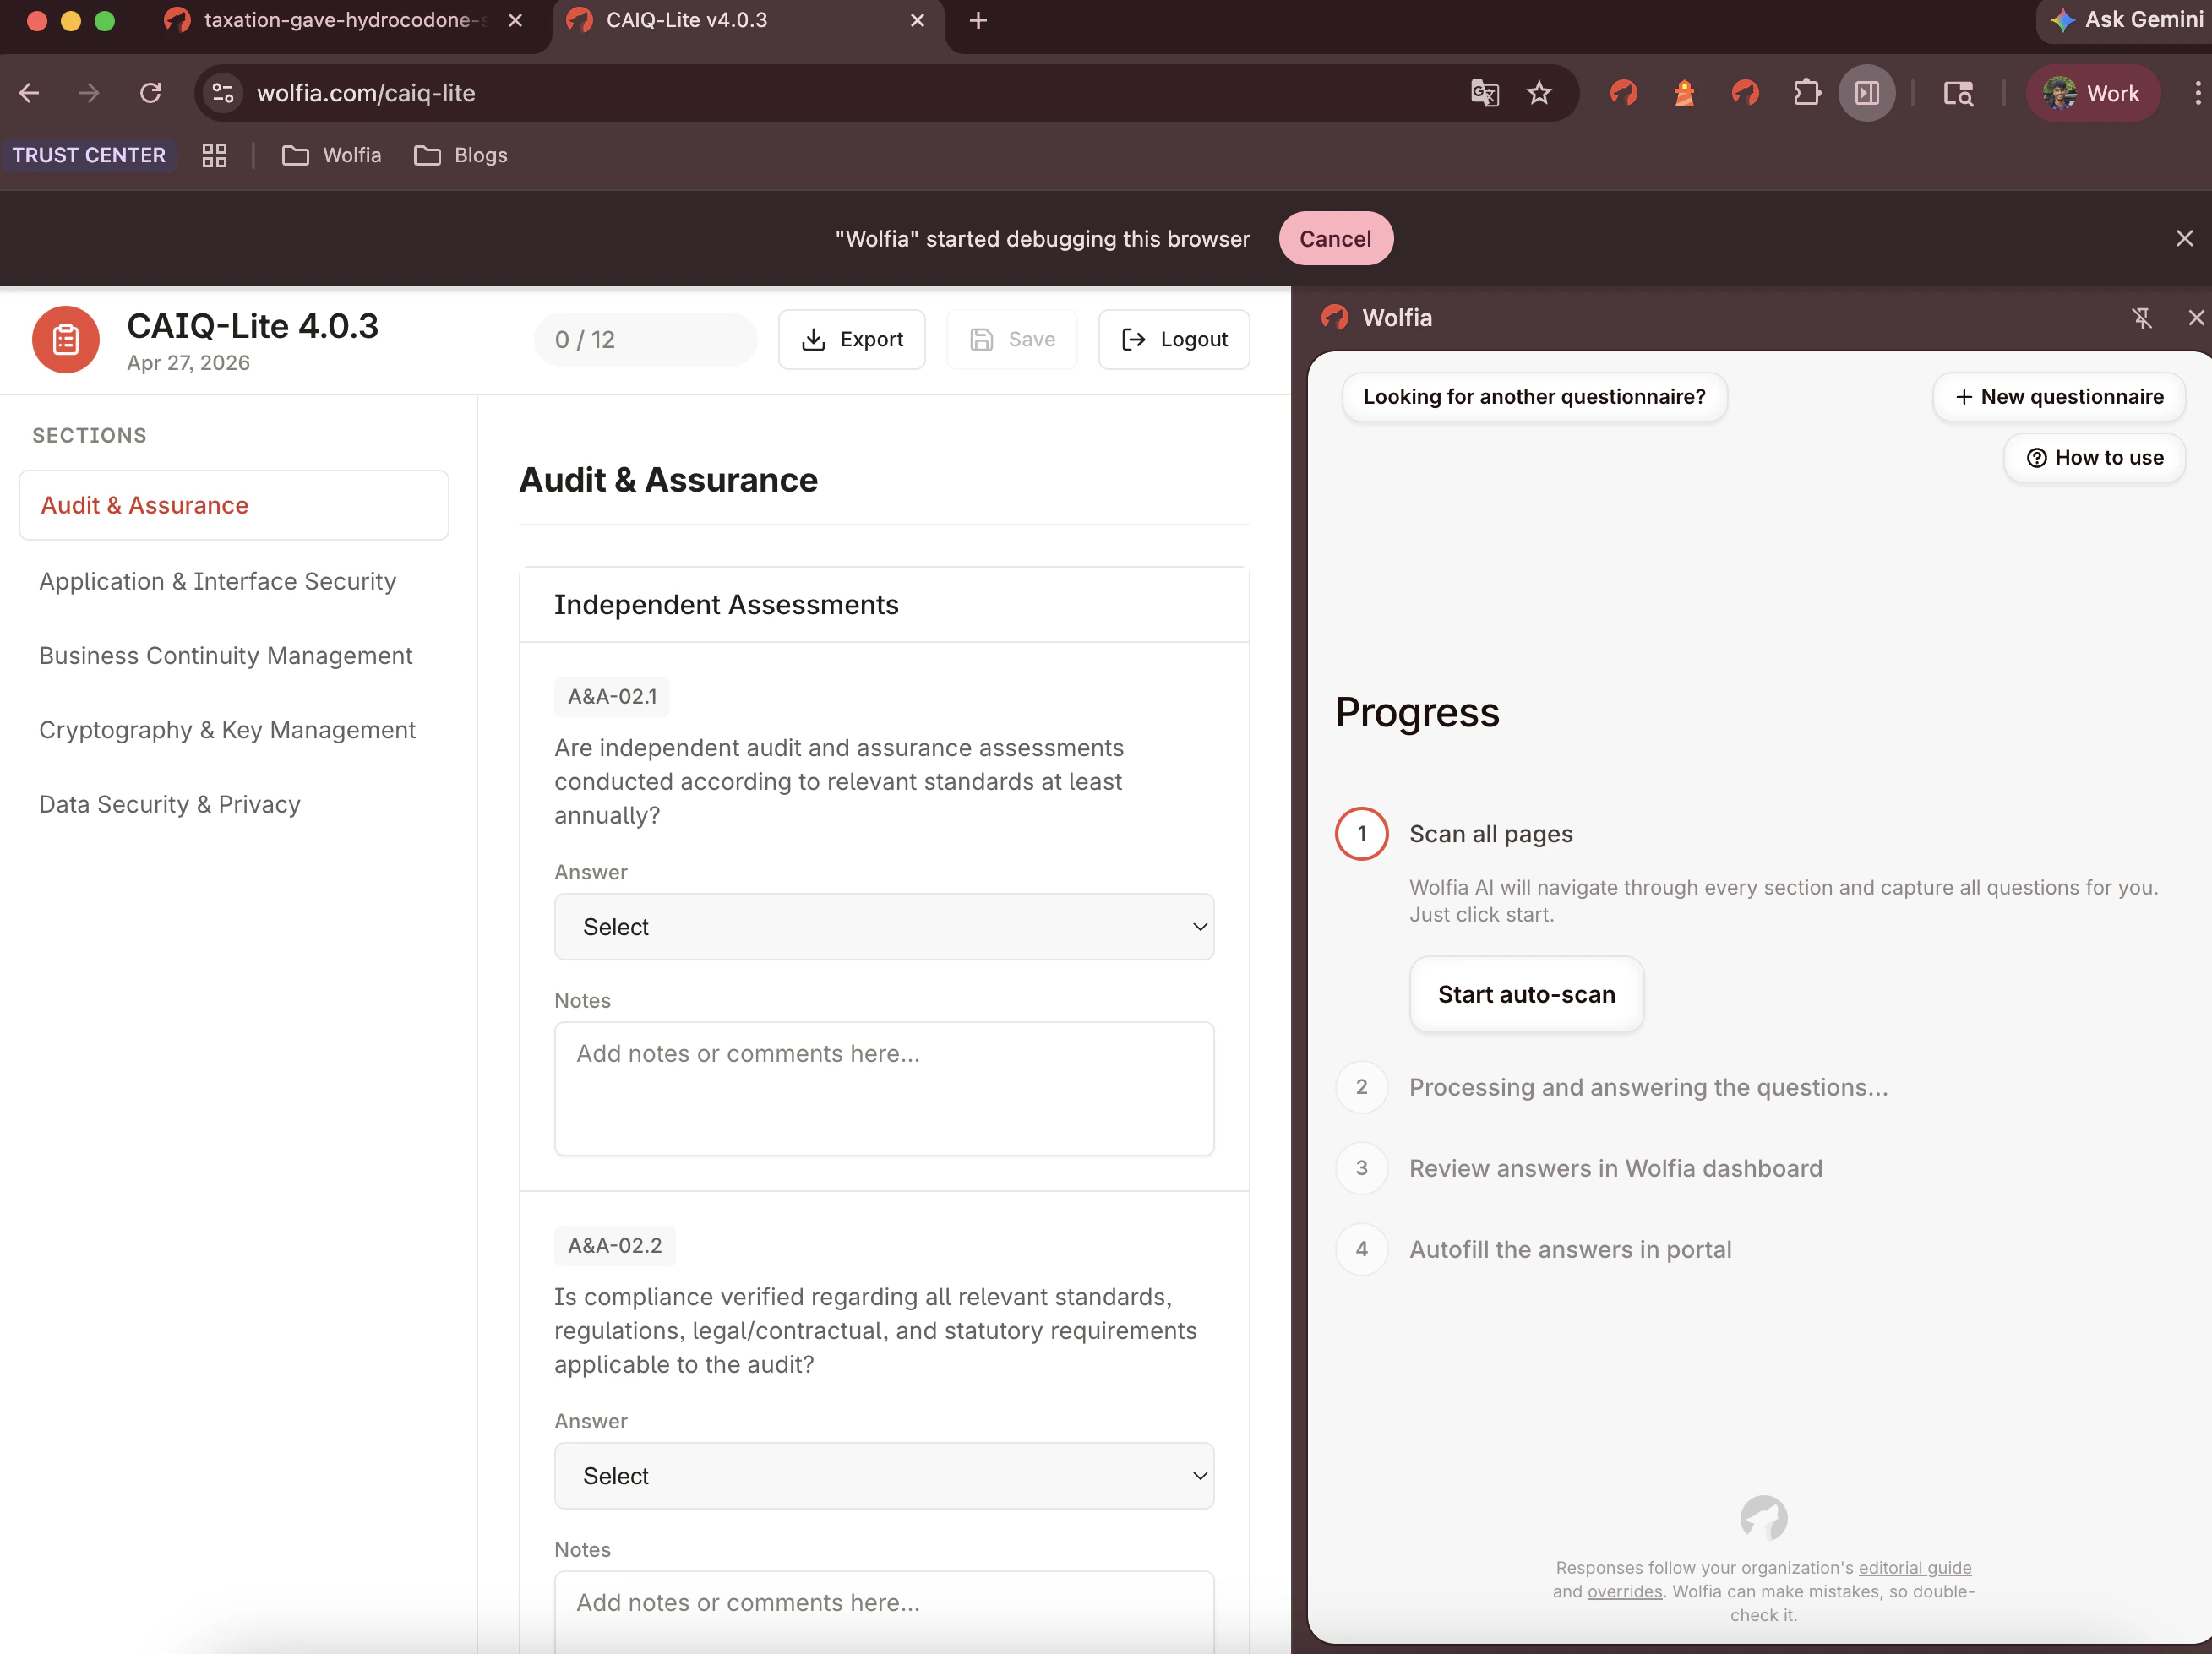
 A Progress tracker opens, listing the steps Wolfia is about to walk through: scan, process, review, autofill. Click **Start auto-scan** to begin. Wolfia navigates through every section of the questionnaire and captures all the questions for you.
Once the auto-scan is running, you can move to other tabs, reply to email, or work on something else. Wolfia keeps scanning even if you close the side panel, and your questionnaire shows up in the dashboard either way.
A Progress tracker opens, listing the steps Wolfia is about to walk through: scan, process, review, autofill. Click **Start auto-scan** to begin. Wolfia navigates through every section of the questionnaire and captures all the questions for you.
Once the auto-scan is running, you can move to other tabs, reply to email, or work on something else. Wolfia keeps scanning even if you close the side panel, and your questionnaire shows up in the dashboard either way.
 If you see a permission or capture error, close the extension, click back into the questionnaire so it's the page you're looking at, then open Wolfia again and click **Start auto-scan** once more.
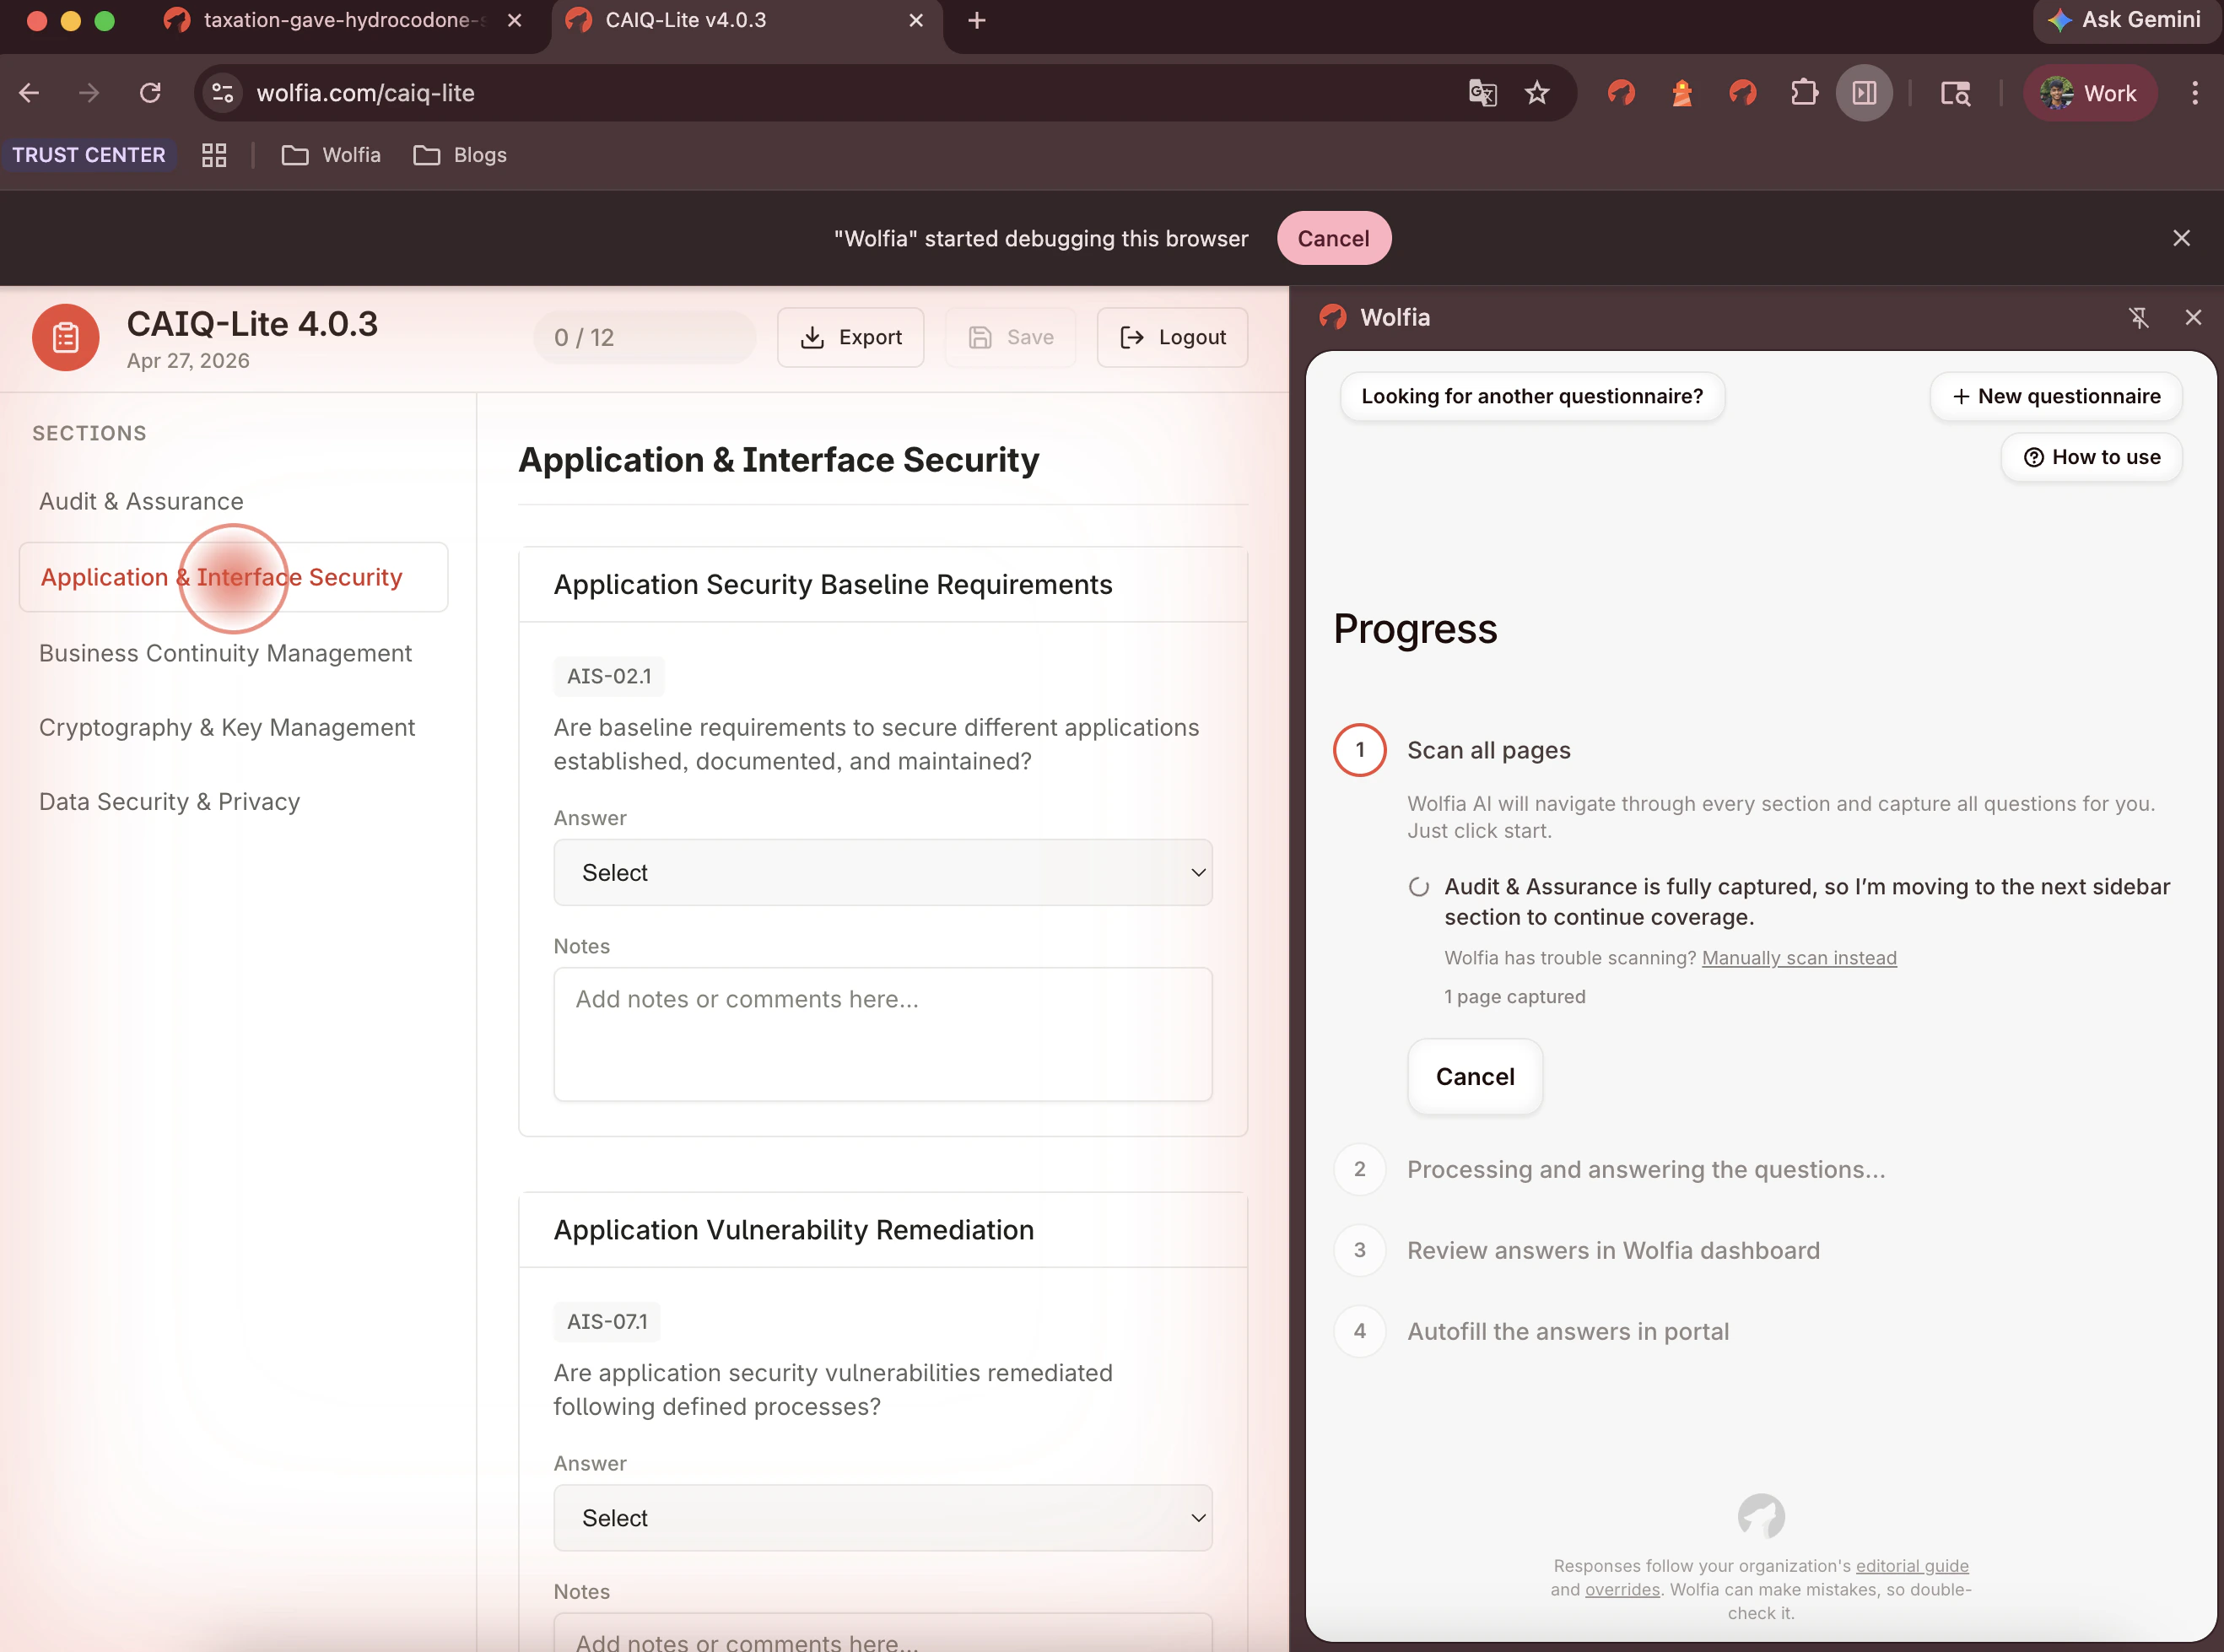
Once it kicks off, you'll see Wolfia navigate through the questionnaire on its own, opening each section and capturing the questions as it goes.
If you see a permission or capture error, close the extension, click back into the questionnaire so it's the page you're looking at, then open Wolfia again and click **Start auto-scan** once more.
Once it kicks off, you'll see Wolfia navigate through the questionnaire on its own, opening each section and capturing the questions as it goes.
 Here's the full auto-scan in action:
## Review the answers in the Wolfia dashboard
When Wolfia finishes scanning and processing, the tracker reaches the **Review answers in Wolfia dashboard** step and shows a **Review** button. Click it. A new tab opens to the questionnaire in your Wolfia dashboard, with every extracted question alongside the answer Wolfia drafted from your knowledge base and citations to the underlying facts.
Here's the full auto-scan in action:
## Review the answers in the Wolfia dashboard
When Wolfia finishes scanning and processing, the tracker reaches the **Review answers in Wolfia dashboard** step and shows a **Review** button. Click it. A new tab opens to the questionnaire in your Wolfia dashboard, with every extracted question alongside the answer Wolfia drafted from your knowledge base and citations to the underlying facts.
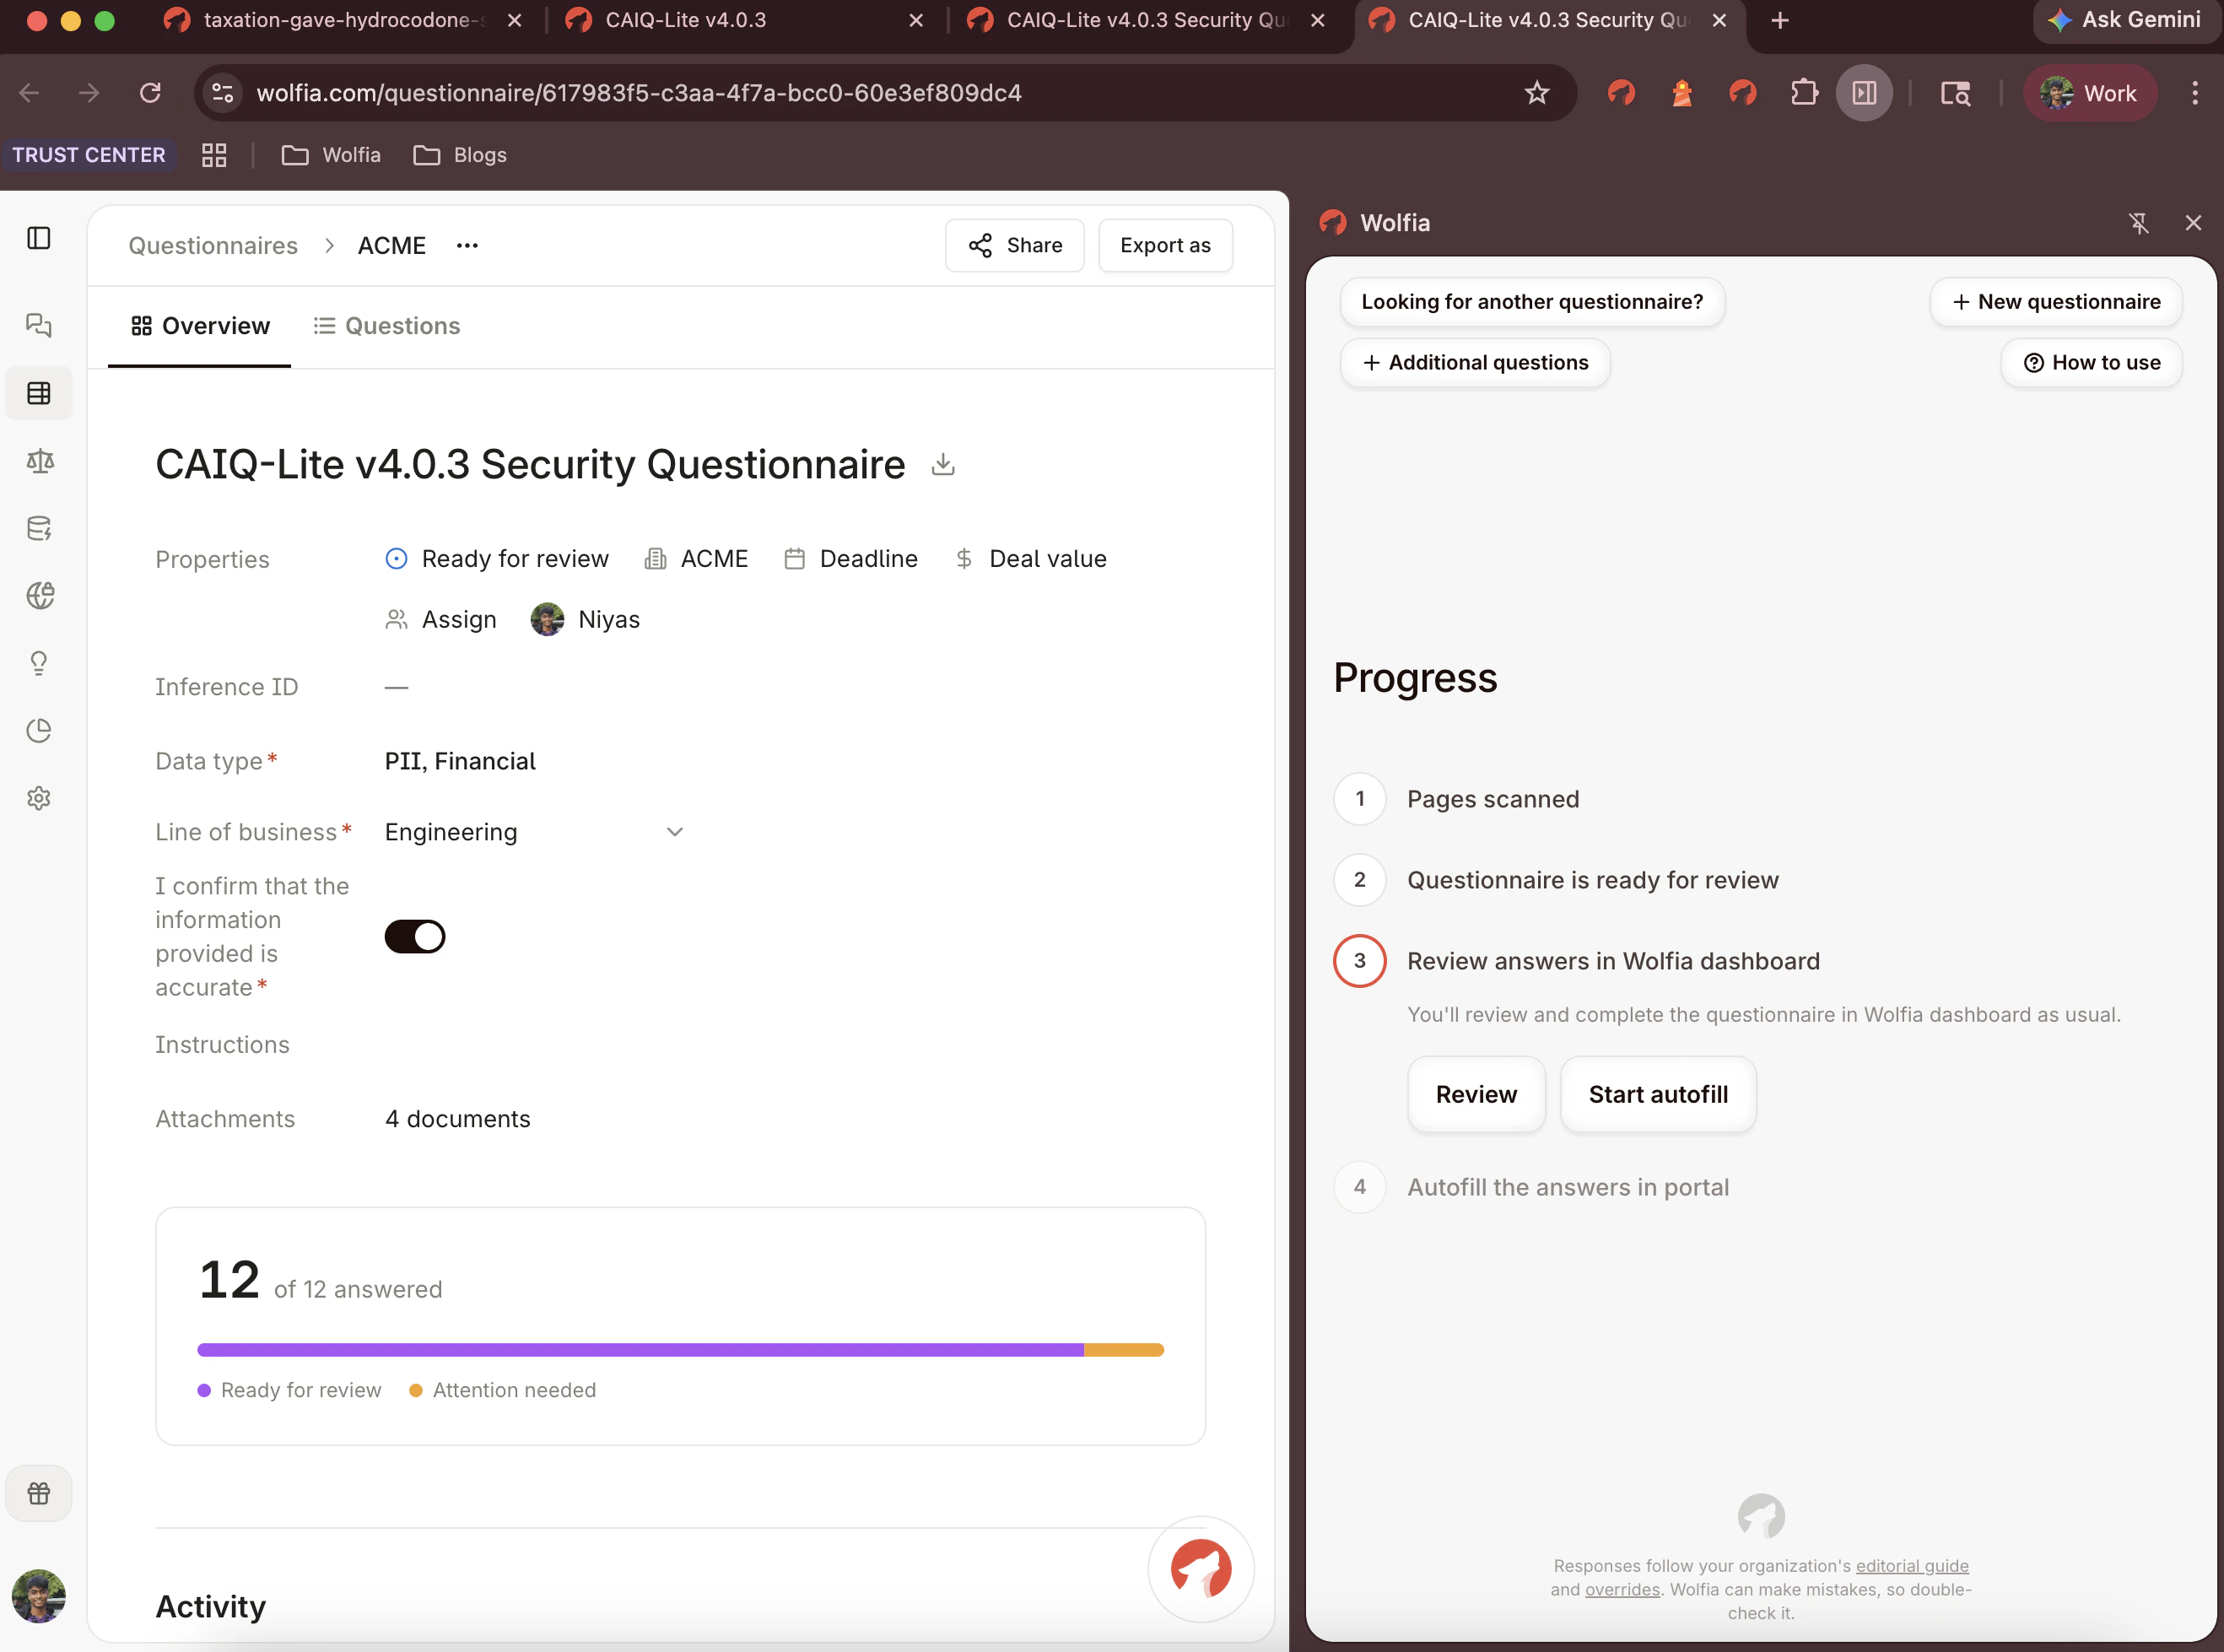 Edit anything that needs a tweak and approve the answers. Your edits become the values Wolfia writes into the portal in the next step, and they also feed back into Wolfia's knowledge for future questionnaires.
## Autofill the portal
Switch back to the browser tab where the questionnaire is open. Open the Wolfia extension again. The Progress tracker is right where you left it, on the **Review** step.
Click **Start autofill** next to the Review button. The tracker advances to the **Autofill the answers in portal** step. Click **Start auto-fill** there to begin.
If the portal already has answers typed in, Wolfia shows a one-time **If a field already has an answer** prompt. Pick **Keep existing answers** to leave them or **Override** to replace them with your reviewed answers.
Edit anything that needs a tweak and approve the answers. Your edits become the values Wolfia writes into the portal in the next step, and they also feed back into Wolfia's knowledge for future questionnaires.
## Autofill the portal
Switch back to the browser tab where the questionnaire is open. Open the Wolfia extension again. The Progress tracker is right where you left it, on the **Review** step.
Click **Start autofill** next to the Review button. The tracker advances to the **Autofill the answers in portal** step. Click **Start auto-fill** there to begin.
If the portal already has answers typed in, Wolfia shows a one-time **If a field already has an answer** prompt. Pick **Keep existing answers** to leave them or **Override** to replace them with your reviewed answers.
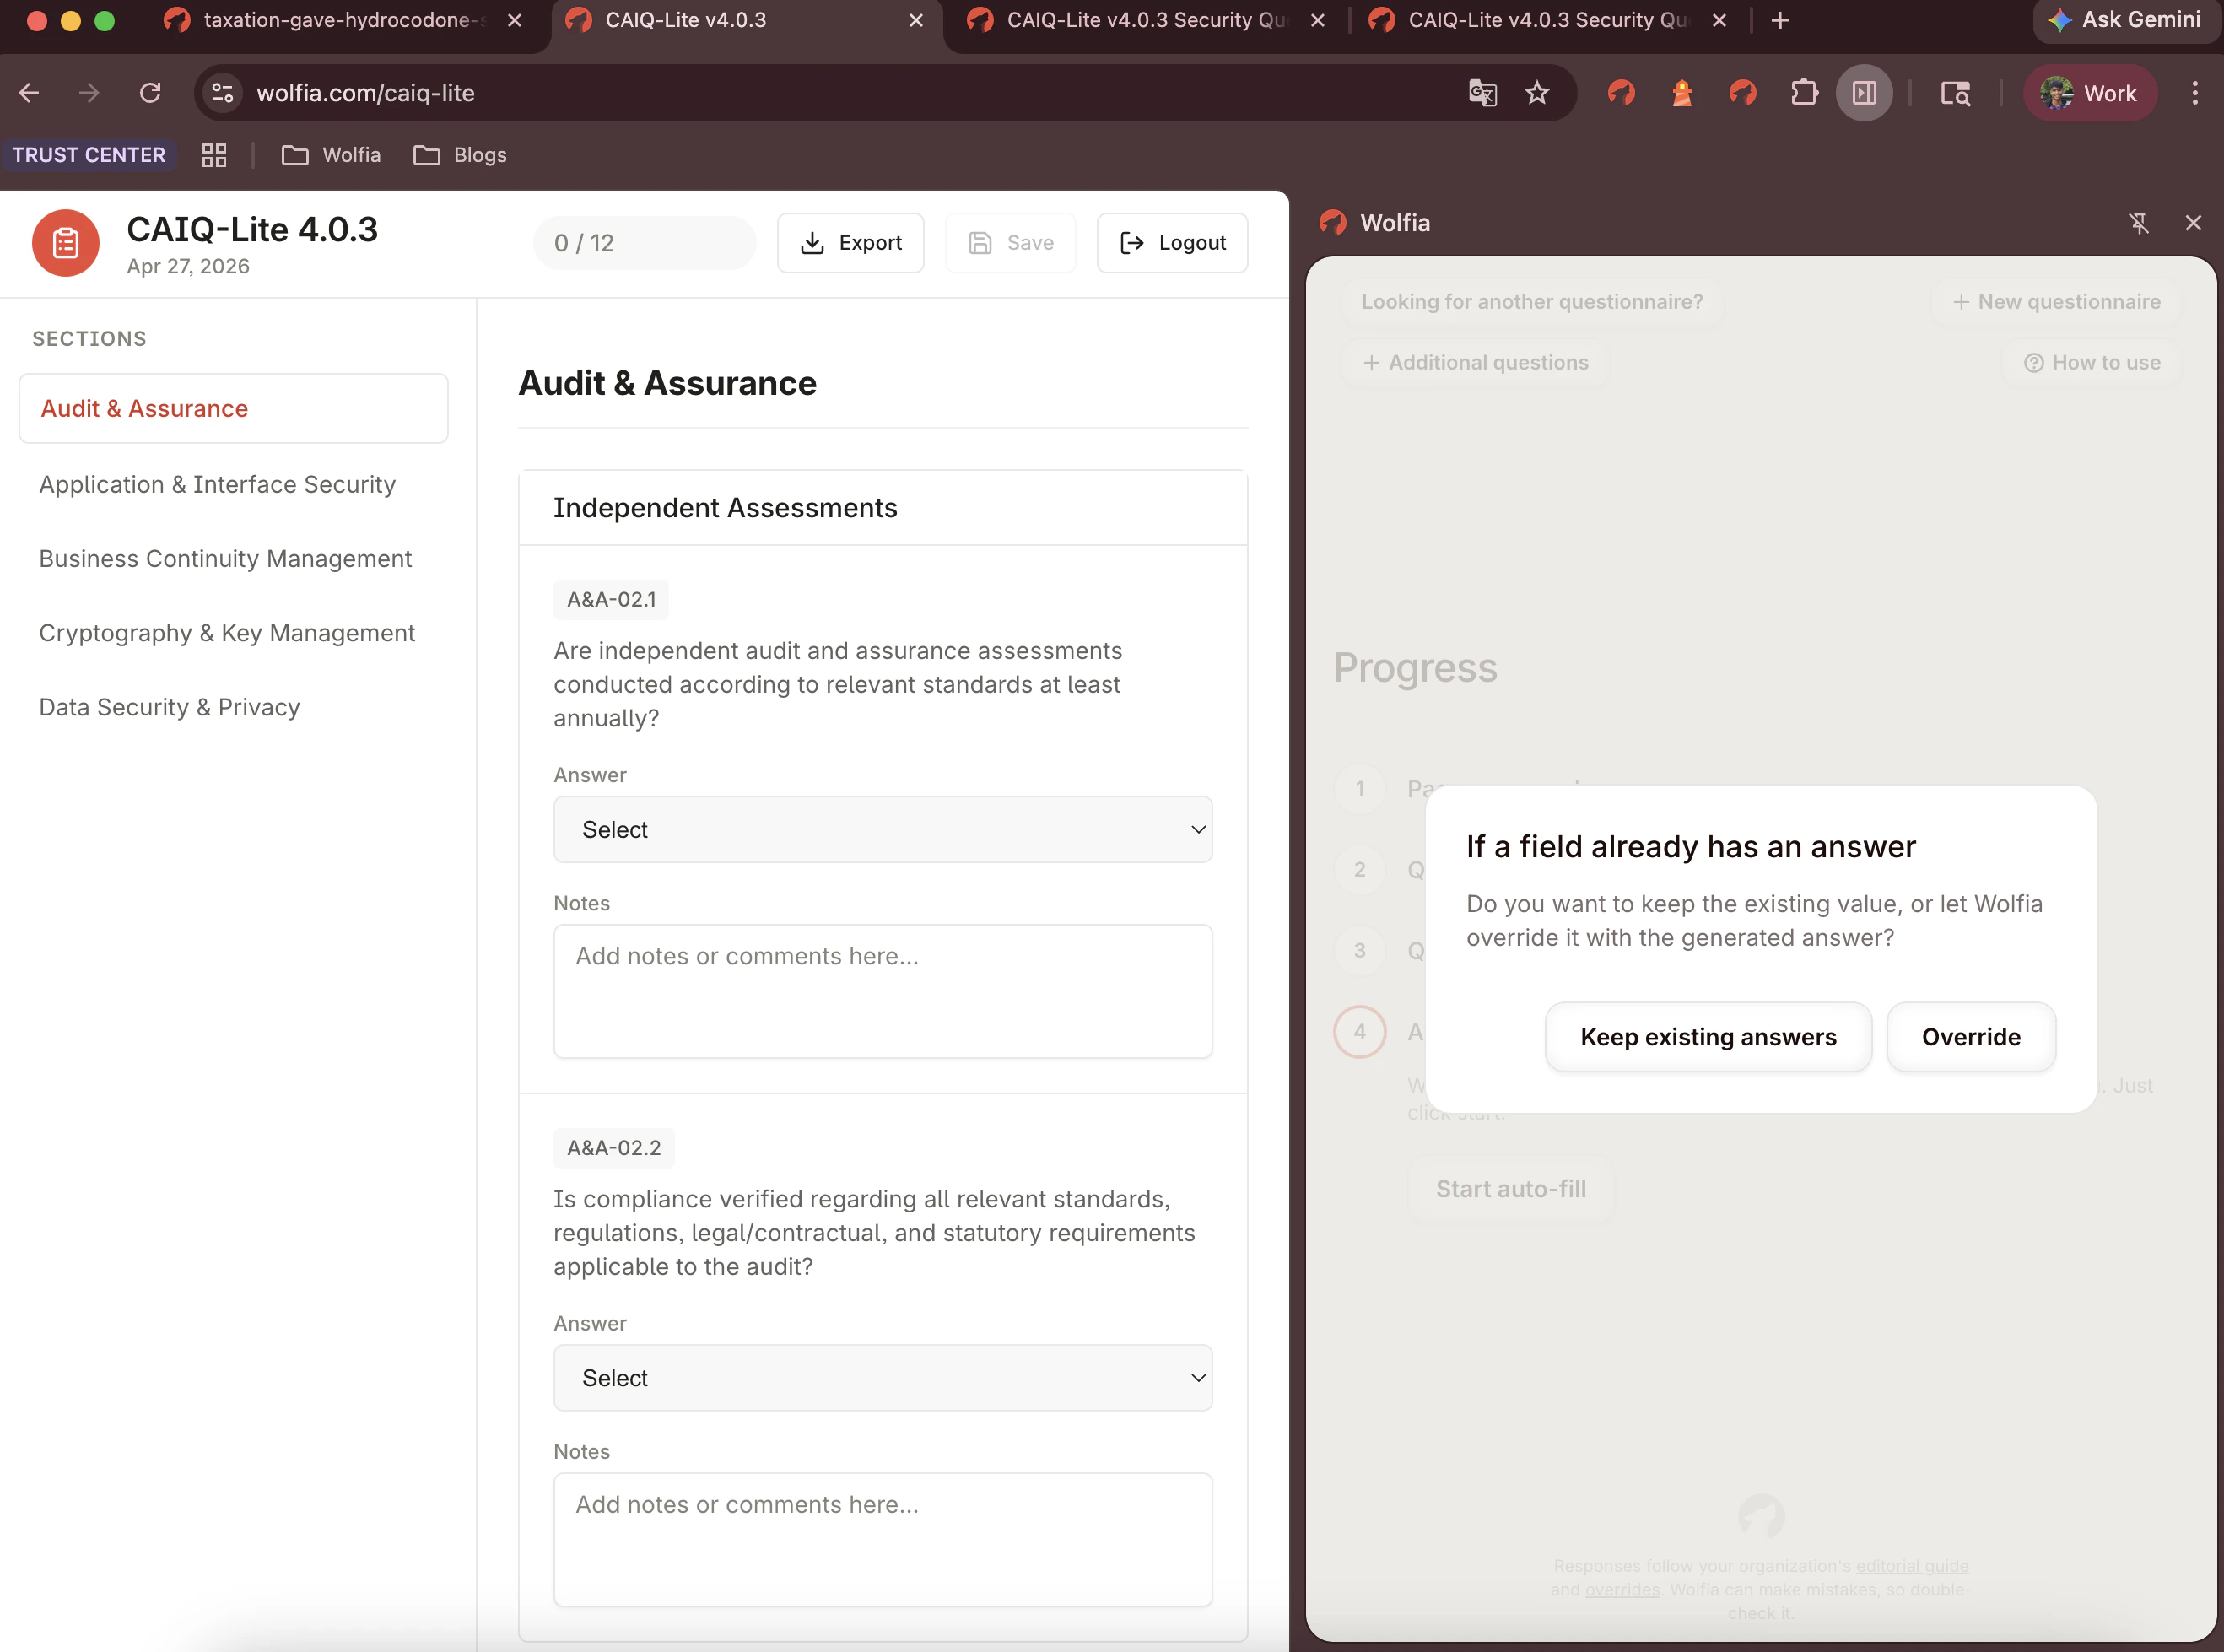 Wolfia then fills in your approved answers across the form. On portals without auto-fill support, click **Fill Current Page** once for each page.
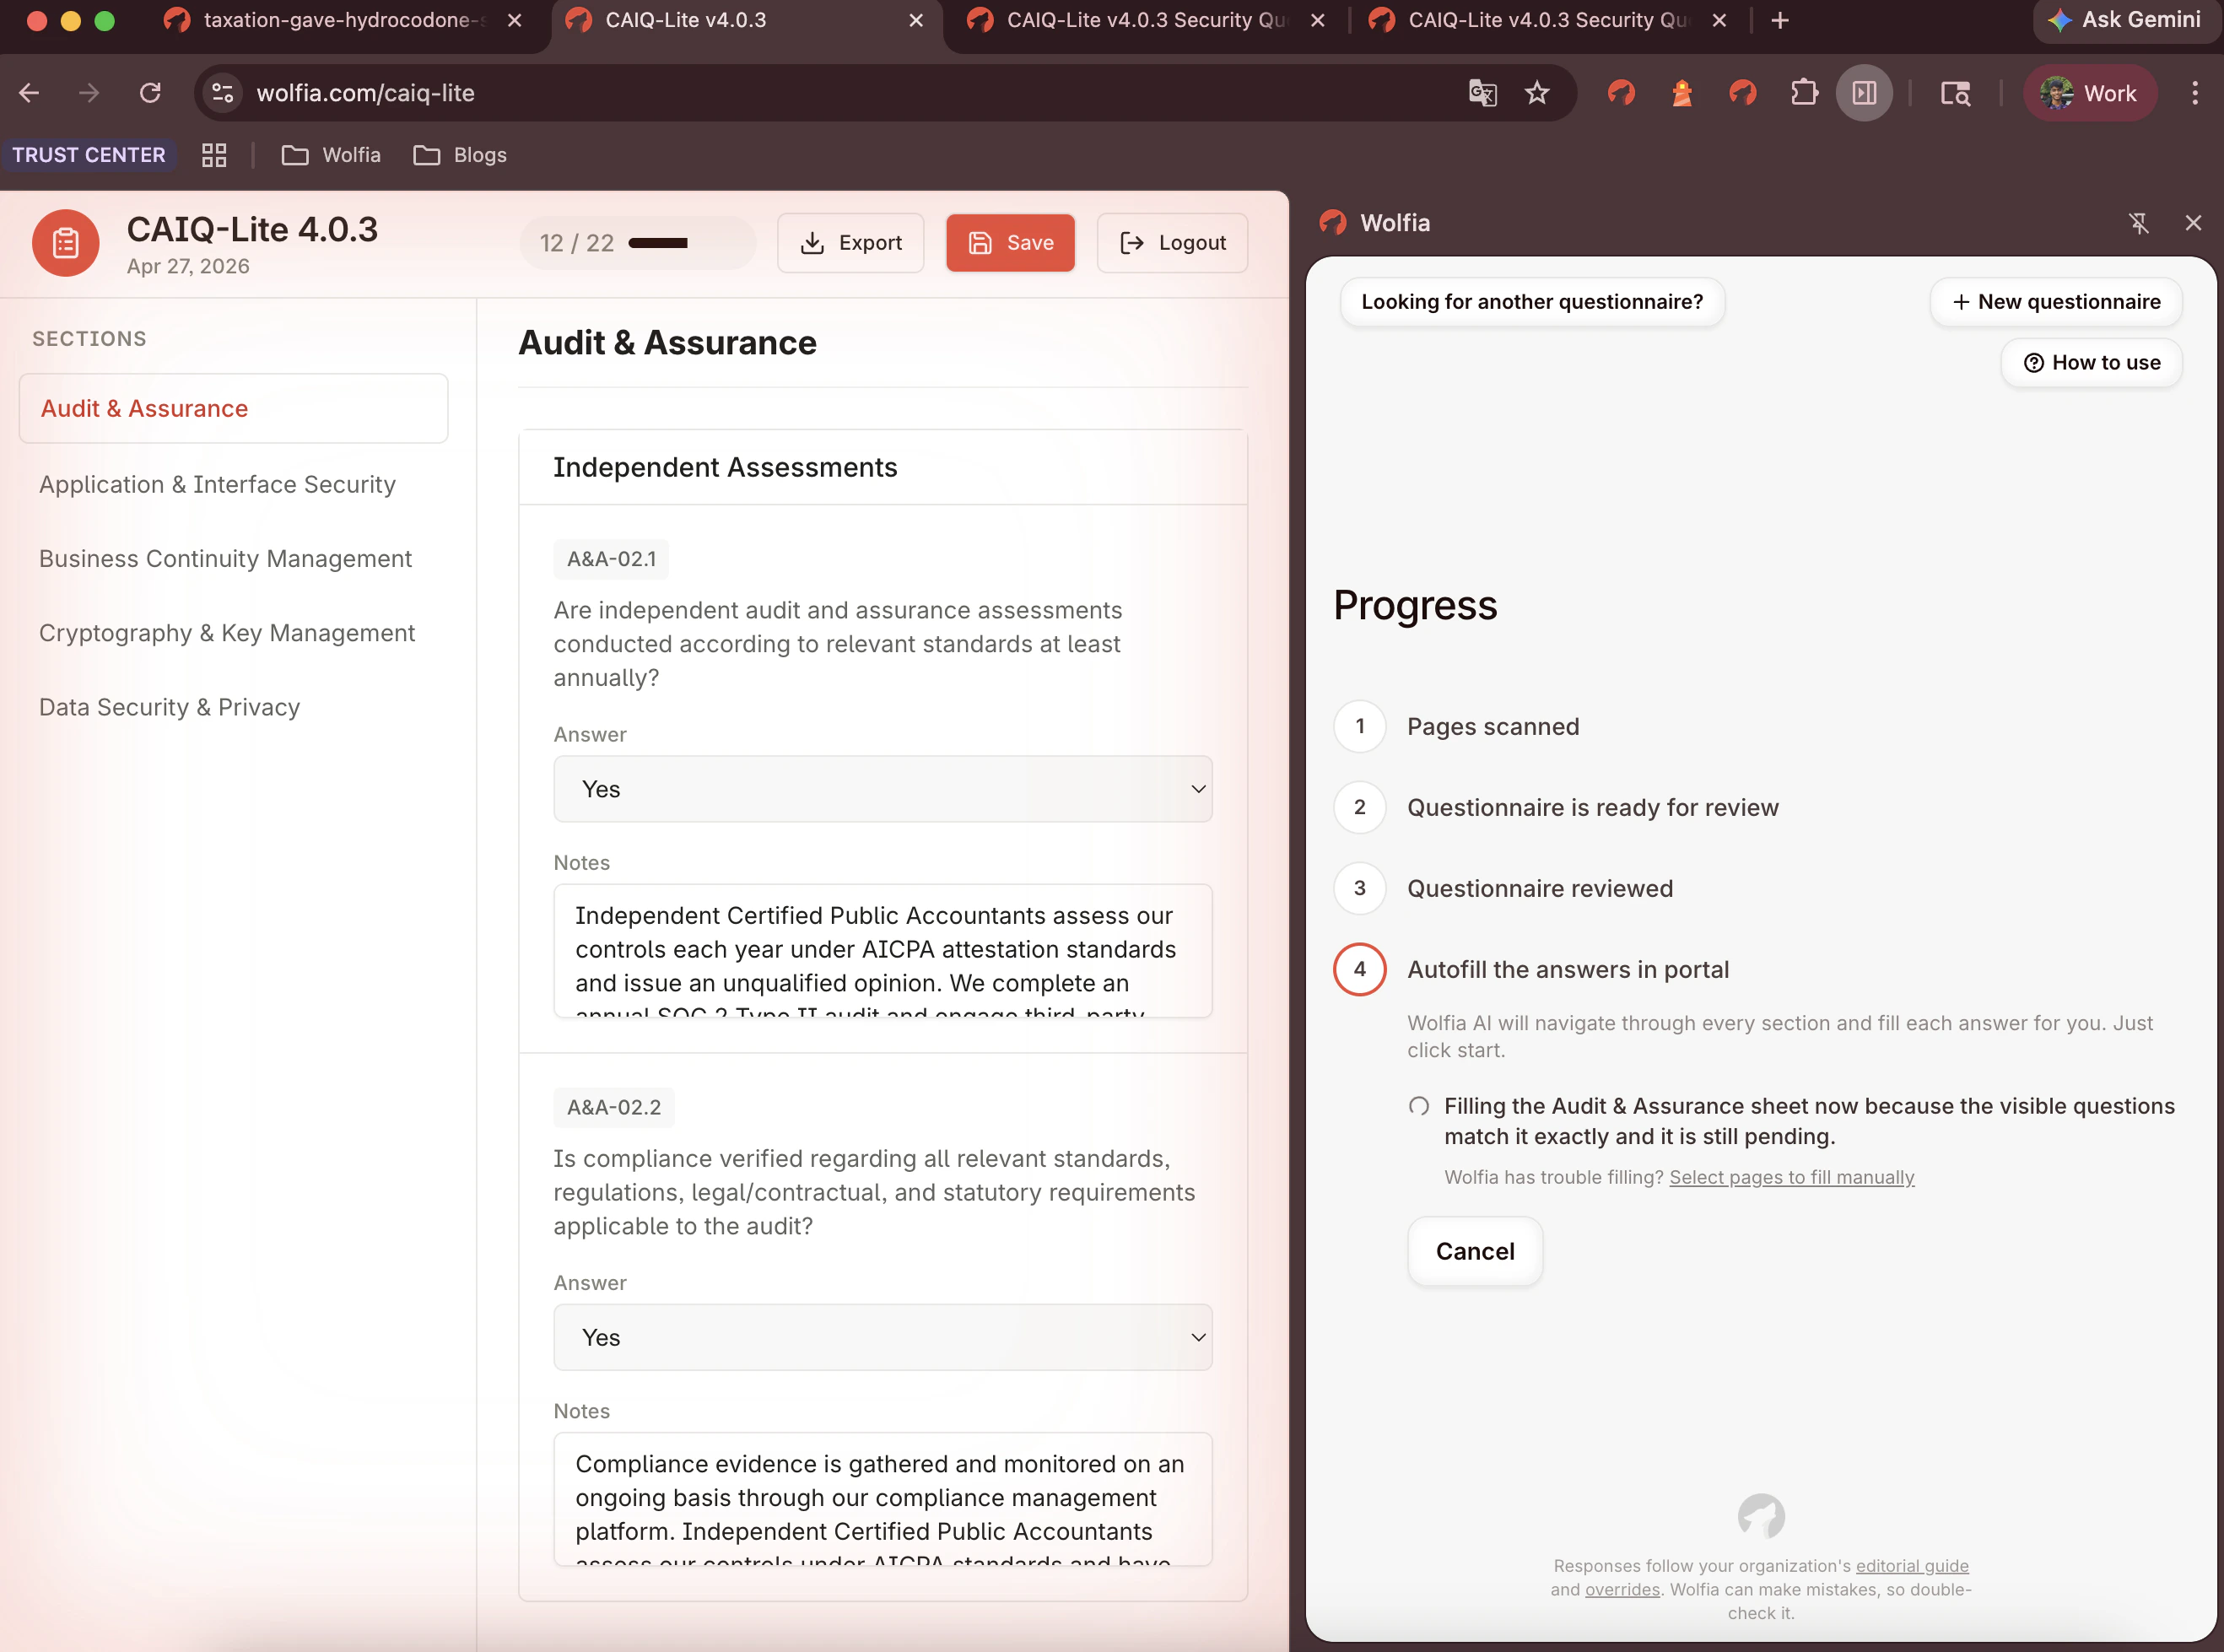 Here's the autofill in action:
Your reviewed answers are now in the portal's form, ready for you to submit through the portal whenever you're done.
## Next steps
Portal support, requesting a new portal, and troubleshooting.
Here's the autofill in action:
Your reviewed answers are now in the portal's form, ready for you to submit through the portal whenever you're done.
## Next steps
Portal support, requesting a new portal, and troubleshooting.